
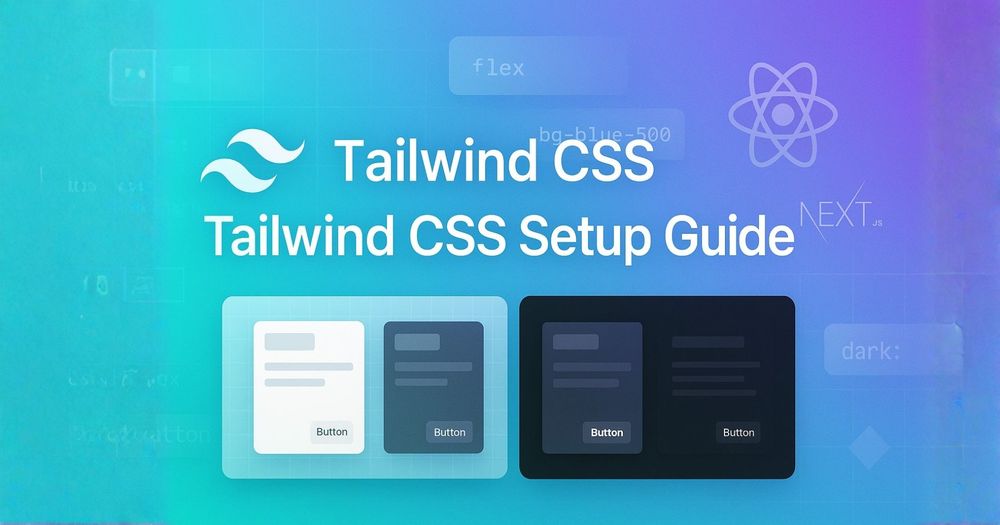
This comprehensive guide walks you through setting up Tailwind CSS versions 3 and 4 in both React and Next.js projects, covering installation steps, configuration, component patterns, dark mode implementation, best practices, and common troubleshooting scenarios.
If you've been building web applications recently, you've probably heard about Tailwind CSS. It's transformed how many of us approach styling by letting us compose designs directly in our markup using utility classes. No more jumping between HTML and CSS files or dealing with naming conventions that inevitably break down as projects grow.
This guide walks through setting up Tailwind CSS in both React and Next.js projects, covering both version 3 (still widely used in production) and version 4 (the latest release with significant improvements). We'll also tackle the sometimes confusing dark mode setup, which trips up even experienced developers.
Understanding Tailwind's Philosophy
Before diving into setup, it's worth understanding what makes Tailwind different. Instead of writing custom CSS for each component, you apply pre-built utility classes directly to your elements.
Think of it like having a massive toolkit where each class does one specific thing really well. Want padding? Add p-4. Need it responsive? Make it md:p-8. This approach feels weird at first if you're coming from traditional CSS, but once it clicks, you'll find yourself building interfaces remarkably fast.
The magic happens during build time when Tailwind scans your files and includes only the styles you actually use. This means despite having thousands of available utilities, your final CSS bundle stays lean.
Setting Up Tailwind CSS v3 in React with Vite
Let's start with version 3 in a React project using Vite. Version 3 remains incredibly popular, especially in existing codebases, and understanding its setup helps when maintaining older projects.
First, scaffold your React project with Vite:
npm create vite@latest my-react-app -- --template react-ts
cd my-react-app
Now install Tailwind and its peer dependencies. These peer dependencies (PostCSS and Autoprefixer) handle the CSS transformation pipeline that Tailwind relies on:
npm install -D tailwindcss@3 postcss autoprefixer
npx tailwindcss init -p
That init -p command creates two configuration files. The -p flag specifically generates a PostCSS config alongside the Tailwind config, saving you a manual step.
Open the generated tailwind.config.js and tell Tailwind where to look for classes in your project:
/** @type {import('tailwindcss').Config} */
export default {
  content: [
    "./index.html",
    "./src/**/*.{js,ts,jsx,tsx}",
  ],
  theme: {
    extend: {
      // Your custom design tokens go here
    },
  },
  plugins: [],
}
The content array is crucial. It tells Tailwind which files to scan for class names. Miss a path here, and you'll wonder why your styles aren't working.
Next, replace the contents of src/index.css with Tailwind's directives:
@tailwind base;
@tailwind components;
@tailwind utilities;
These directives inject Tailwind's styles into your CSS. The order matters: base styles provide resets and defaults, components are for pre-built component classes, and utilities are your bread-and-butter utility classes.
Finally, ensure this CSS file is imported in your src/main.tsx:
import './index.css'Run npm run dev and you're ready to start using Tailwind classes in your components!
Setting Up Tailwind CSS v4 in React
Version 4, released in late 2024, represents a significant architectural shift. The biggest change? No more PostCSS dependency for most use cases. Tailwind now includes its own lightning-fast engine written in Rust, making setup simpler and builds faster.
Start with the same Vite setup:
npm create vite@latest my-react-app -- --template react-ts
cd my-react-app
Installation is notably simpler for v4:
npm install tailwindcss @tailwindcss/viteInstead of PostCSS configuration, you'll add Tailwind directly to your Vite config. Update vite.config.ts:
import { defineConfig } from 'vite'
import react from '@vitejs/plugin-react'
import tailwindcss from '@tailwindcss/vite'

export default defineConfig({
  plugins: [
    react(),
    tailwindcss(),
  ],
})
In your src/index.css, the syntax changes slightly:
@import "tailwindcss";That's it! Version 4 automatically detects your content files without explicit configuration. The new engine handles everything internally, resulting in faster builds and hot reloads.
Setting Up Tailwind CSS v3 in Next.js
Next.js projects have their own considerations, especially with the App Router introduced in version 13. Let's walk through v3 setup for Next.js:
npx create-next-app@latest my-next-app --typescript --app
cd my-next-app
Install the Tailwind stack:
npm install -D tailwindcss@3 postcss autoprefixer
npx tailwindcss init -p
Configure tailwind.config.js with Next.js-specific paths:
/** @type {import('tailwindcss').Config} */
module.exports = {
  content: [
    "./app/**/*.{js,ts,jsx,tsx,mdx}",
    "./pages/**/*.{js,ts,jsx,tsx,mdx}",  // if using pages directory
    "./components/**/*.{js,ts,jsx,tsx,mdx}",
  ],
  theme: {
    extend: {},
  },
  plugins: [],
}
Notice we include both app and pages directories. This ensures compatibility whether you're using the newer App Router or the traditional Pages Router.
Add Tailwind directives to app/globals.css:
@tailwind base;
@tailwind components;
@tailwind utilities;
Make sure this CSS file is imported in your root layout (app/layout.tsx):
import './globals.css'

export default function RootLayout({
  children,
}: {
  children: React.ReactNode
}) {
  return (
    <html lang="en">
      <body>{children}</body>
    </html>
  )
}
Setting Up Tailwind CSS v4 in Next.js
For version 4 in Next.js, the process leverages PostCSS (which Next.js uses internally anyway):
npx create-next-app@latest my-next-app --typescript --app
cd my-next-app
Install v4 with its PostCSS plugin:
npm install tailwindcss @tailwindcss/postcssCreate a postcss.config.mjs file:
/** @type {import('postcss-load-config').Config} */
const config = {
  plugins: {
    "@tailwindcss/postcss": {},
  },
};

export default config;
Update app/globals.css:
@import "tailwindcss";The import statement in your layout remains the same. Version 4's intelligence means it automatically finds your content files in a Next.js project.
Working with Components
Once set up, using Tailwind is identical across versions. Here's a practical card component that showcases common patterns:
function Card({ title, description, highlighted = false }) {
  return (
    <div className={`
      max-w-sm rounded-lg overflow-hidden shadow-lg p-6
      ${highlighted ? 'bg-blue-50 border-2 border-blue-500' : 'bg-white'}
      hover:shadow-xl transition-shadow duration-300
    `}>
      <h2 className="font-bold text-xl mb-2 text-gray-900">
        {title}
      </h2>
      <p className="text-gray-700 text-base leading-relaxed">
        {description}
      </p>
    </div>
  );
}
Notice how we handle conditional styling with template literals. This pattern keeps your JSX readable while leveraging Tailwind's utilities.
Implementing Dark Mode Properly
Dark mode is where many developers hit roadblocks. The approach differs between v3 and v4, and the documentation can be confusing. Let me break it down clearly.
Dark Mode in Tailwind v3
First, enable class-based dark mode in your tailwind.config.js:
module.exports = {
  darkMode: 'class',  // This enables manual control
  // ... rest of your config
}
Now create a theme toggle component that manages the dark class on your HTML element:
// components/ThemeToggle.tsx
import { useEffect, useState } from 'react';

export function ThemeToggle() {
  const [theme, setTheme] = useState('light');

  useEffect(() => {
    // Check for saved preference or default to light
    const savedTheme = localStorage.getItem('theme');
    const prefersDark = window.matchMedia('(prefers-color-scheme: dark)').matches;

    const initialTheme = savedTheme || (prefersDark ? 'dark' : 'light');
    setTheme(initialTheme);

    // Apply the theme
    if (initialTheme === 'dark') {
      document.documentElement.classList.add('dark');
    }
  }, []);

  const toggleTheme = () => {
    const newTheme = theme === 'light' ? 'dark' : 'light';
    setTheme(newTheme);

    // Update DOM
    if (newTheme === 'dark') {
      document.documentElement.classList.add('dark');
    } else {
      document.documentElement.classList.remove('dark');
    }

    // Save preference
    localStorage.setItem('theme', newTheme);
  };

  return (
    <button
      onClick={toggleTheme}
      className="p-2 rounded-lg bg-gray-200 dark:bg-gray-700
                 text-gray-900 dark:text-gray-100
                 hover:bg-gray-300 dark:hover:bg-gray-600
                 transition-colors"
      aria-label="Toggle theme"
    >
      {theme === 'light' ? '🌙' : '☀️'}
    </button>
  );
}
To prevent the flash of incorrect theme on page load, add this script to your document head. In Next.js, create a component:
// app/ThemeScript.tsx
export function ThemeScript() {
  const themeScript = `
    (function() {
      const theme = localStorage.getItem('theme');
      const prefersDark = window.matchMedia('(prefers-color-scheme: dark)').matches;

      if (theme === 'dark' || (!theme && prefersDark)) {
        document.documentElement.classList.add('dark');
      }
    })();
  `;

  return (
    <script dangerouslySetInnerHTML={{ __html: themeScript }} />
  );
}
Include this in your root layout before the body:
// app/layout.tsx
import { ThemeScript } from './ThemeScript';

export default function RootLayout({ children }) {
  return (
    <html lang="en">
      <head>
        <ThemeScript />
      </head>
      <body>{children}</body>
    </html>
  );
}
Dark Mode in Tailwind v4
Version 4 changes the approach slightly. Instead of a config option, you define dark mode behavior with CSS. Add this to your global CSS file after the Tailwind import:
@import "tailwindcss";

/* Enable class-based dark mode */
@variant dark (&:where(.dark, .dark *));
The theme toggle component remains the same, but v4's engine handles the variant more efficiently.
For a more sophisticated approach using CSS custom properties (works in both versions):
@import "tailwindcss";

:root {
  --color-background: 255 255 255;  /* white */
  --color-text: 17 24 39;           /* gray-900 */
  --color-primary: 59 130 246;      /* blue-500 */
}

.dark {
  --color-background: 17 24 39;     /* gray-900 */
  --color-text: 243 244 246;        /* gray-100 */
  --color-primary: 96 165 250;      /* blue-400 */
}
Then extend your Tailwind config to use these variables:
module.exports = {
  theme: {
    extend: {
      colors: {
        background: 'rgb(var(--color-background) / <alpha-value>)',
        text: 'rgb(var(--color-text) / <alpha-value>)',
        primary: 'rgb(var(--color-primary) / <alpha-value>)',
      },
    },
  },
}
Now you can use bg-background, text-text, and text-primary classes that automatically adapt to the theme.
Best Practices from the Trenches
After working with Tailwind across numerous projects, here are practices that consistently prove valuable:
Keep your config lean. Only extend the theme when you need consistent custom values across your project. One-off styles can use arbitrary values like bg-[#1da1f2].
Embrace component patterns. While Tailwind encourages utility classes, don't shy away from creating component classes for truly repeated patterns. Use the @apply directive sparingly:
@layer components {
  .btn-primary {
    @apply px-4 py-2 bg-blue-500 text-white rounded-lg
           hover:bg-blue-600 transition-colors;
  }
}
Use the official Prettier plugin. Install prettier-plugin-tailwindcss to automatically sort your classes in a consistent order. This makes code reviews much easier.
Leverage IntelliSense. The official VS Code extension provides autocomplete, hover previews, and linting. It's invaluable for learning class names and catching typos.
Consider accessibility. Tailwind makes it easy to build inaccessible interfaces if you're not careful. Always test with keyboard navigation and screen readers. Use semantic HTML and ARIA attributes where appropriate.
Troubleshooting Common Issues
If styles aren't applying, check these in order:
- Verify your content paths in the config match your actual file structure
- Ensure you're importing the CSS file in your app's entry point
- Check for typos in class names (the IntelliSense extension helps here)
- In v3, make sure PostCSS is properly configured
- Clear your build cache and restart the dev server
For production builds appearing broken, you're likely dynamically generating class names. Tailwind can't detect these. Always use complete class names or safelist them in your config.
Resources for Deeper Learning
The official Tailwind CSS documentation remains the best resource for understanding individual utilities and configuration options. For Next.js specific guidance, check the Next.js styling documentation.
The Tailwind UI component library (paid) showcases professional patterns and best practices. Even if you don't purchase it, the free examples demonstrate solid component architecture.
For staying updated on v4 developments, follow the Tailwind CSS GitHub repository and the official blog.
Moving Forward
Tailwind CSS has fundamentally changed how many of us build interfaces. Whether you choose the stable v3 or embrace the improvements in v4, you're getting a battle-tested tool that scales from prototypes to production applications.
The key to mastering Tailwind isn't memorizing every utility class. It's understanding the mental model of composing designs from small, purposeful pieces. Start with the basics, gradually explore advanced features like animations and custom variants, and don't hesitate to peek at the source code of sites you admire.
Remember, Tailwind is a tool, not a religion. Combine it with other approaches when they make sense. Use CSS modules for complex animations. Write custom CSS when you need to. The goal is shipping great user experiences, and Tailwind is simply one powerful way to get there faster.